

My boyfriend is back soon from his trip from Switzerland! If not late tomorrow, then Monday for sure. He’s out there to photograph for the Snow Polo in St Moritz, taking a few days before to ski a bit and enjoy the mountain air. And what a perfect opportunity is this for me to create a cute digital painting of him!
Copy and Paste
A few years ago, I pencil sketched him in my little sketchbook whilst he was photographing another tournament. One of the wonderful things about digital art is that one can simply import from a photograph of an old analog drawing and start working on it. On my Procreate app, this was made possible by of course importing first, then expanding followed by trimming the edges to your liking with the eraser. I made the background grey to make the trimming more visible.

Color Him In!
Once I was done trimming the drawing (left), I proceeded in coloring. For each area of the subject including the camera parts, I used a different layer. This makes it easier to tweak any such area when needed, ie. making the eyes bigger as we see below. And as demonstrated later, adding texture becomes easier too as we use the Clipping Mask tool. The brush used was the Dry Square Inker but in future I may like to switch back to the Medium Airbrush as it gives better coverage. Once done, I changed the background color to light blue and added some texture stamps in white. This is just the beginning, and so far looking good!

Adding Texture
Now the time to add some details and texture to both the subject and background! Various textures were incorporated to the camera, and I tried many possibilities till I came up with what suited most. So happy I purchased some add-on brushes! For that, I went for some from Lisa Glanz’s Texture Brushes available from Creative Market. I then worked on the background but by then decided to switch the color to olive green and experiment with some green leafy textures (another add-on, Jason’s Expressive Brushes) along with some lighting effects such as Linear Light and Linear Burn. How cool is that!
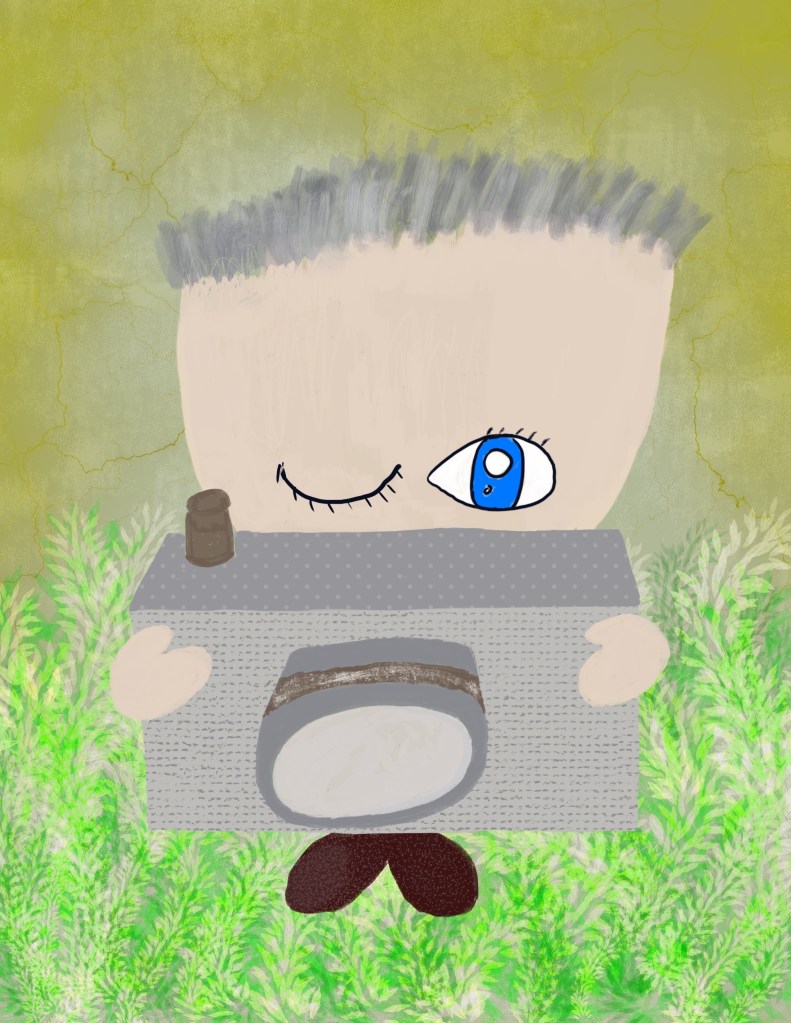
More Tweaking
At this point, I was not sure about the color scheme especially the background. I tried a few permutations. Darker? Lighter? Seeing that my boyfriend’s favorite color is blue, I then consulted him. Then came up with this turquoise-teal blue. The green leaves and the lighting effects still worked well, even better than the olive green. As a small detail, I also made the color of the camera lens whiter for enhancement, adding some speckly textures in it too for fun. So here it is!

And how sweet does he look! One of the wonders of digital painting is being able to work on an existing artwork, digital or in this case analog, and playing around with the colors, lighting and textures to produce another stunning piece. In future, I can even change the colors again and make the background different altogether! That should be another experiment I would like to work on, but meanwhile I am happy with this particular one and so is my boyfriend. He’s in for a surprise!

1 Comment