

I’m back now! It’s been a crazy past few weeks as I am still trying to sell my apartment in Amsterdam which has been on the market since last August. Changing realtors, I was advised to paint the walls white, empty out existing furnitures, clear out and declutter more, and have it restyled by an in-house interior designer. The apartment is going to be relisted this weekend so fingers crossed! As such I had no time to paint or write my blogs till now. And today, I would like to share and write about a digital painting I did a few weeks ago whilst following the next lesson of Maurizio di Angelis’ tutorials.
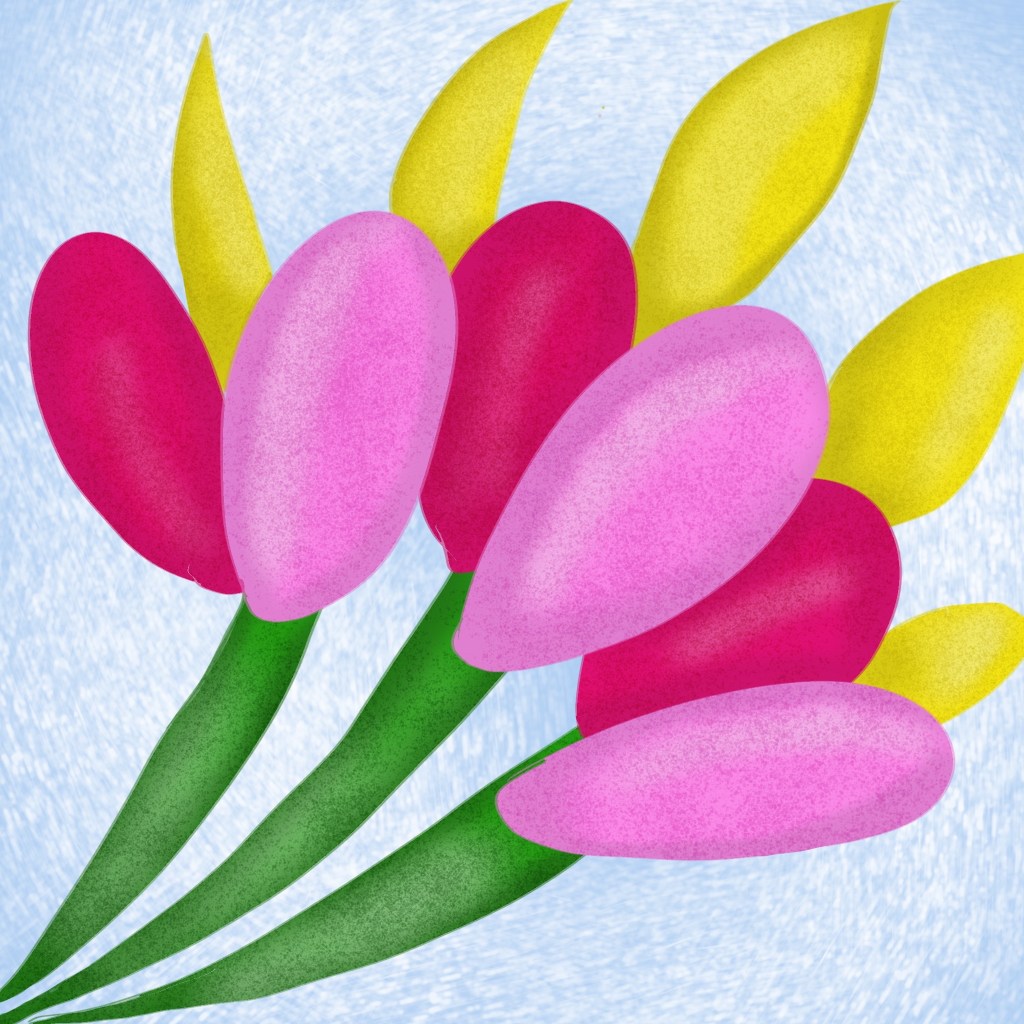
Flower Buds
I am almost finished with the classes on digital air-brushing techniques. Whilst already having mastered the light and shade techniques, I am now learning to add some texture with spray-paint flicks. These lessons typically begin with drawing flowers but this time, I thought I would do something different like not adding any petals. This time, they are just buds! It is as if we are waiting for the flowers to bloom, a perfect symbolism for my present situation with my apartment; striving for a new beginning so to speak.

Adding Dimension
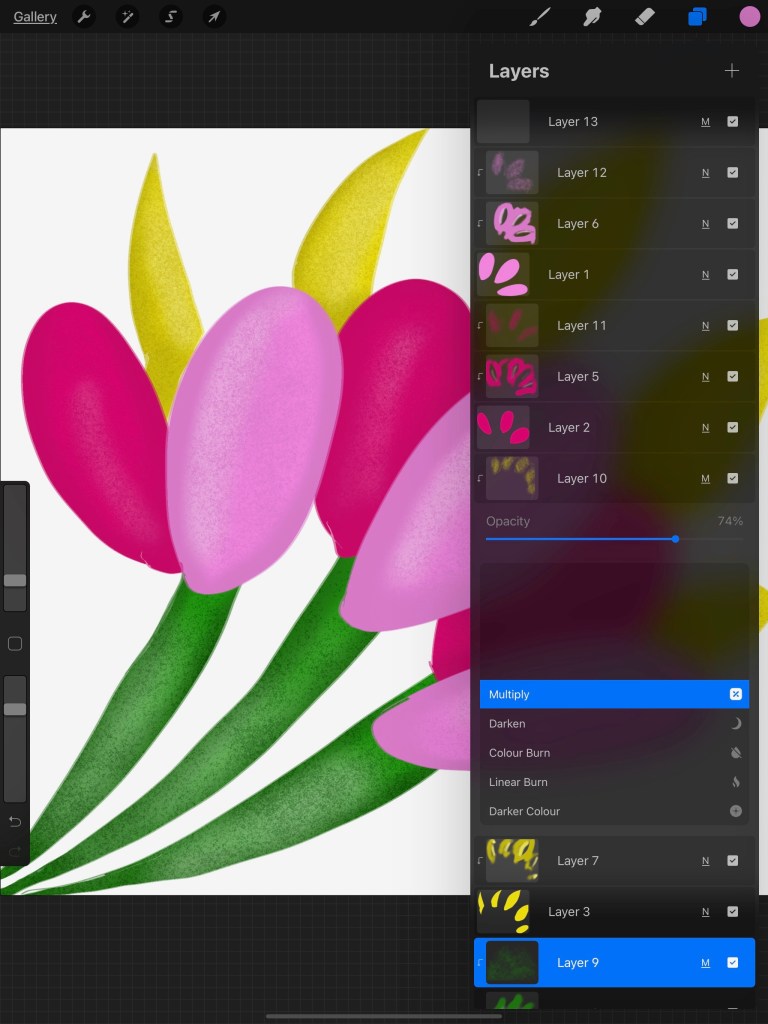
Each of the colors come with separate layers, ie. Layer 1 for the green stems, Layer 2 for the yellow buds, Layer 3 for the red and Layer 4 for the pink. Then for each layer, the Clipping Mask was switched on to enable shading and highlighting using the Medium Nozzle. I’m getting the hang of this, as practice makes perfect!

Adding Texture
In the tutorial, Maurizio shows us how to incorporate a spotty texture with another medium, Spray Paints. Each of the corresponding shade/highlight layers come more layers with clipping masks before we spread some spray paint. Then we enhance them by multiplying them, as illustrated below. So far so exciting!
Background Change
When painting, it is more practical to paint the background first, but the beauty of digital art is that we can go back and change it if we decide on something else. Going back to the Background layer or adding a new layer and moving it to the bottom are ways to go about it. In this case, I merely changed the Background Color to blue. A new layer was further added on top of the Background in which Hard Rain from the Elements menu was incorporated. Then I thought I’d play with the colors a bit more and fine-tuned the Hard Rain with some color dodge. And now, I am definitely done here!
It’s great to be back getting creative again! This morning I resumed the watercolor painting I had started on a few weeks ago, and tomorrow I have an on-line session with my Japanese painting class on Zoom which I am looking forward to. And now I’m able to start writing my blog! Hopefully this will be a new beginning as I enter the next phase of my relocation and new life in the countryside.

This is great work! And it looks fun, too! Good luck with your apartment!
LikeLike