

Sharing with you a kawaii fairy painting I created following Lesson 2 of Juliette Crane’s Serendipity I class. Interestingly enough, every time I follow her classes, I somehow end up painting a fairy or something fancy. I’ve done it again this time! Since we are encouraged to collage different elements, experiment with different mediums and throw in vivid colors freely, I end up loving the pretty background so much that I don’t want to destroy it! And this gives me the excuse to create a little fairy with a flowy flamboyant gown and as the sides are also too precious to paint over, I add the wings out of them.
The Background
At the beginning of the class, we make our own collage paper, later to be torn up with bits glued onto our main painting. I have written about it in Another Collage Paper. Below, you will see what I’ve done with it. Left of the photo is the collage paper I had created. After finally deciding to take the plunge to cut it up, I randomly glued on the bits with acrylic medium on my previously-gessoed A3 Cansons Mixed Media paper. Some more collage papers such as pink wrapping tissue and orange Mulberry paper were then added on. Once the medium was dry, I painted in between the white spaces. I was planning on making the upper half sky and bottom half grass so used Teal and Green Gold fluid acrylic, respectively. Once the paint was dry, I doodled in more flowers and hearts with some colored India Ink (Dr Ph Martin’s has a wide range of beautiful shades), gouache (Holbein’s Acryla) and Molotow acrylic markers. So far, so cool as well as cute! So do you recognize some of the collage bits on the painting?

Developing Character
And now I am ready to paint my little fairy! The method which Juliette uses totally makes sense, and I would like to incorporate this into my future paintings. First cut out a circle with coloured wrapping tissue and another one and if you want, with musical sheet to give some character. I myself used Japanese-language newspaper as I firstly have no music sheets at hand, and I think something with “foreign” writing could add some mystery! The face was then painted in using a blend of Titanium White with Quinacridone Nickel Azo Gold fluid acrylic, both by Golden. I should have taken Juliette’s advice about avoiding collaging areas where you are going to have the face placed because of the creases and wrinkling, but it was too late. Not to fret, I shall keep that in mind, and meanwhile, I shall tell you how I solved the issue later on. The hair was then colored in, and whilst Juliette used red, I decided to go for Primary Magenta. Interested to see how it will all look as an alternative to my usual brown. Then I painted the eyes with some Antelope Brown and used that color to also add some streaks to the hair. And here comes the challenging part: the body!

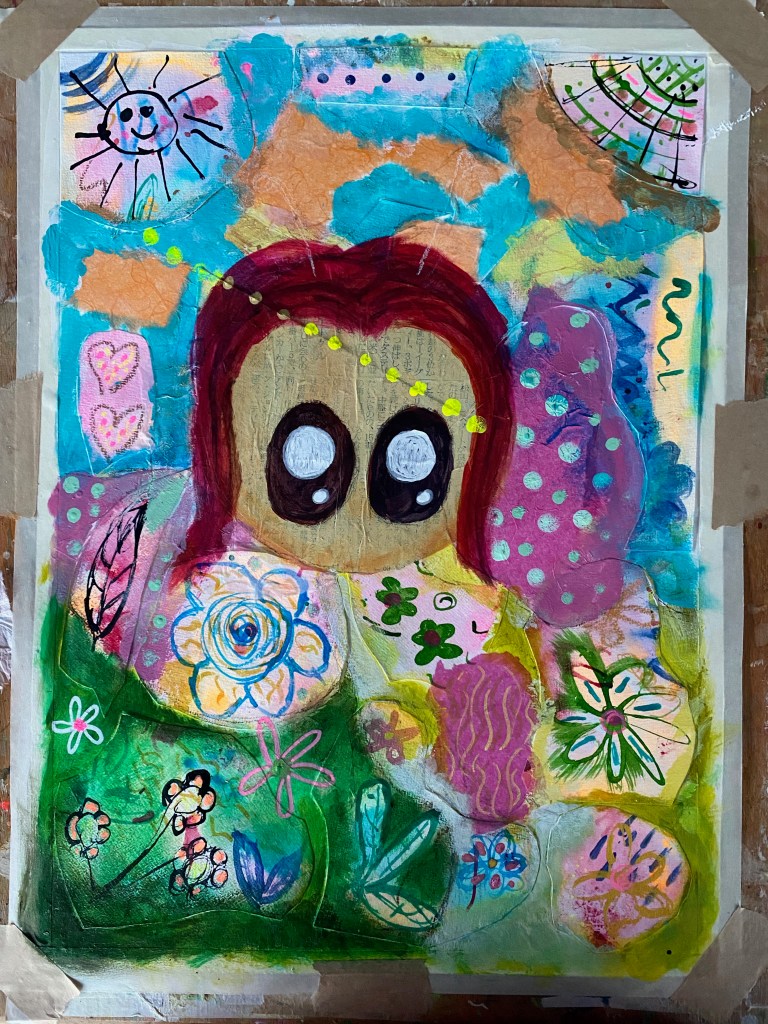
Working Intuitively
Noticing that horrible crease across the fairy’s face, I thought I’d just work around it and dot on some fluorescent yellow and gold, as if they were sunrays or something. And now that I have the face done, how about the rest? At this point, I had no idea and tried out different possibilities. I didn’t want to lose the beautiful flower patterns below. Nor did I want to cover up the pink area with the baby blue dots. Too pretty. And so I decided to make them wings! A good start. Now how about the gown? How should it look and how big and what shape? That was a huge challenge as I kept sketching with my Stabillo charcoal pencil and erasing it then starting again. Once I decided, I added some white on the border of he dress and painted the grass Permanent Green by which time I thought a darker shade, ie Sap Green, would work better. Nah still not 100% happy. I was not too keen about the two greens being next to each other. I pondered for a while…
Finalizing the Fairy
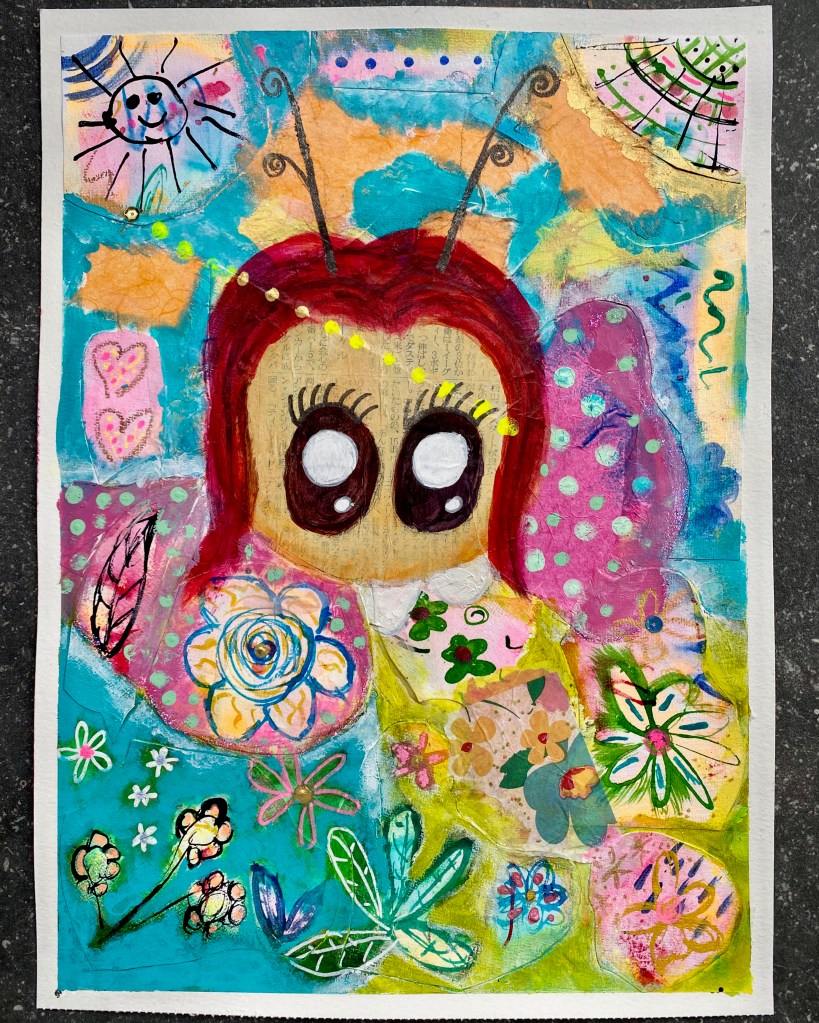
Then it dawned on me. Why make the fairy stand on grass? She is supposed to be flying in air, right? And so I covered the green area with the Teal I had used for the sky. And now we’re talking! I’m loving the way adding this new layer created a negative space effect on the flowers that had been on the green grass. Luckily, some flowers and leaves had been doodled in with white acrylic marker beforehand to fill in the empty space. I followed Juliette’s advice and tapped in some white on the outer edge of the fairy so she would pop out. And sure enough, she does! Her right wing had some adjustments too. I painted the area outside the big flower by mimicking the other wing, the pink with baby blue dots. I then added the cute little antennas on her with a new product, Nuvo’s glitter pen in Urban Graphite, which I love by the way, as you really see the sparkles. Used this pen on the eyelashes too! As final touch, I spread a bit of pink glitter glue on the edges of the wings, followed by a few sequins dotted around the painting. Can you see them? And well, now I can safely say that I’m definitely happy with the painting!
Though challenging, I always have fun following Juliette Crane’s classes as I do with other artists’. The fun lies with going beyond your comfort zone and not knowing what to expect. Whilst these classes act as a guideline as to what to create and how, the rest is up to you from which you can come up with your own style. The classes are also great when you have run out of inspiration or ideas and need a little boost to get you going. Looking forward to more of Juliette’s classes and see what else I could create. Another fairy maybe? Or perhaps I’ll try something different, like a cute whimsical animal.
Click here to find out more about Juliette Crane and her wonderful classes!
