

Yay, Wilma the Witch is back in town this Halloween! Actually Little One thought it would be a good idea to dress as a witch again this year and call herself Wilma, seeing how popular she was at Halloween parties the past couple of years. Halloween is indeed tomorrow, and she is getting ready for some trick or treating with her friends! So why not make another painting about Wilma again this year?
The Beginning
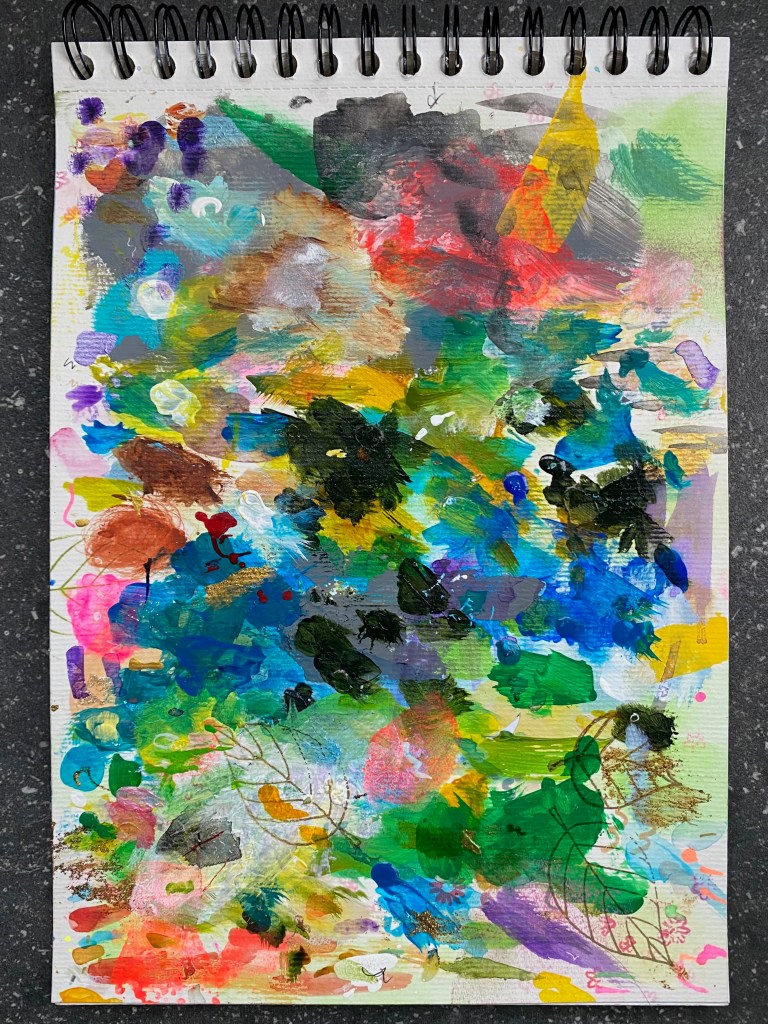
So what are all these random splotches of paint on this sketchbook page? Whenever I am painting, I like to mix or test my colors first before applying them on my painting. Sort of like a palette used over and over again till the whole page is filled up. This make a great basis for mixed media artwork, something I do regularly as I prefer not to waste paper and excess paint. As you can see, too, it is not only the plethora of colors that give this a good basis for a painting, but check out the texture too! That is made possible when blobs of paint harden. Sketchbook is Canson’s A4 pad of Mixed Media paper (300 gsm). Quite a lot of potential here!
Preparing Wilma
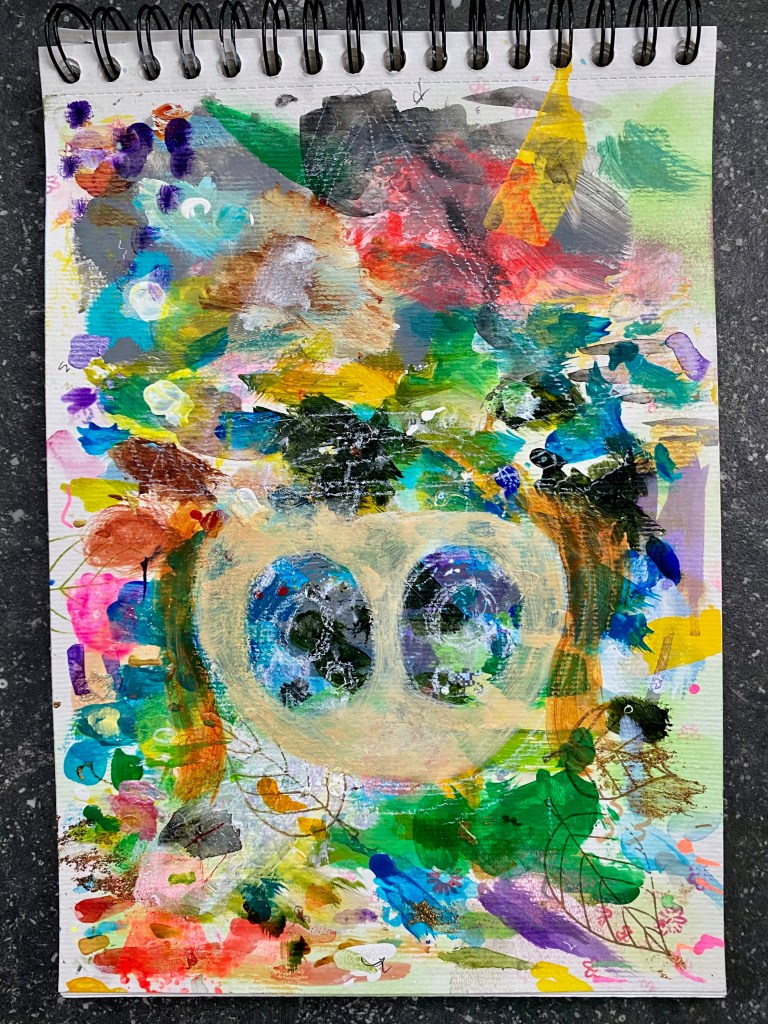
With some white water soluble marking pencil, I set about a brief outline of Wilma, making sure she adequately fills up the page. The face was placed not too much in the center as we need room to fit the hat. Furthermore, I wanted to retain the rubber-stamped leaves which would add to the autumnal mood. The face was then firstly painted with a blend of Quinacridone Azo Nickel Gold and Titanium White, with the excess of the former color spread on the hair. Like the last time I painted Wilma, I thought it would be cool to leave the eyes the color of the palette mixture and hence created a negative space effect for her eyes. Adds some mystery doesn’t it?
Continuing Painting Wilma
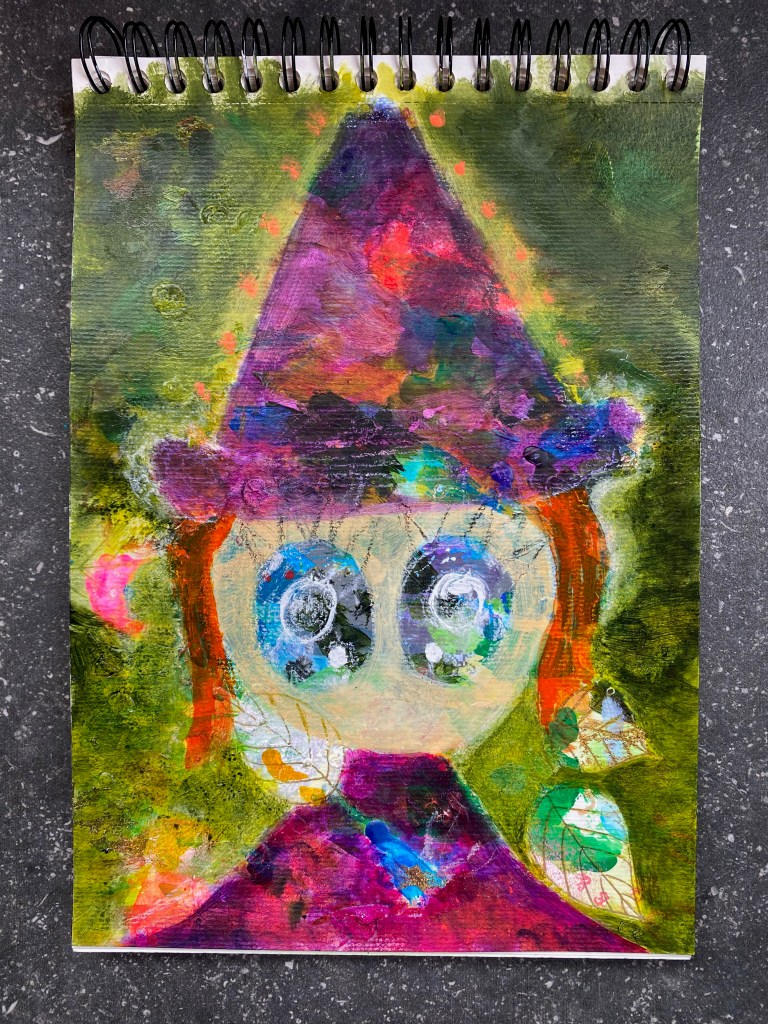
I wanted Wilma to have a purple outfit this time. With the hair being a shade of dark orange, a green background seemed a sensible choice to create a triad of secondary colors (purple, green and orange). The background was firstly painted, although I worked back and forth between the subject and the background. Golden Fluid Acrylics were mainly used here: Sap Green Hue, Green Gold and Titan Buff for the background and Ultramarine Violet and Quinacridone Magenta for the costume with a bit of Fluorescent Red dabbed on for the color to pop out. Good thing I didn’t go too heavy handed with painting the costume as I love how the colors below show through. Also, as I was working on another project involving fluorescent orange 3D paint, I gently dotted the excess along the hat. Looking good so far!
Finishing off Wilma
Once I was done with the basic painting, it was time to incorporate some texture and bling! The eyes were worked on firstly by lining the top lid with black Stickles glitter glue, then drawing some lashes and filling them up with black Izink Glitter paint with the whites of the eyes drawn in with white Molotow marker. I had Wilma hold the leaf by making it white feather and lining the stick with gold glitter pen, then drew her arm with a flourescent yellow 3D Liner. The moon was then added using that 3D Liner, with the excess dotted on her collar. Then some gold relief paint on her hair for more texture and bling. The background was then touched up with some starry gold Glitter Gel. Et voilà!

And what a fun session that was! Although I was in a bit of time pressure to complete this painting by Halloween, it went quite smoothly as I had a good idea of what I wanted. What I was aiming for was getting Wilma to be more whimsical rather than scary despite it being a Halloween theme. Hopefully I nailed it! I am quite pleased with how the color scheme turned out too by focussing on the triad of secondary colors. And now, doesn’t Wilma look ever so adorable? Too adorable in fact to be scary! Enjoy Halloween, everyone, and stay safe!
