

And here is the second of my three Hello Kitty ceramic figures I created at the Symposium-Workshop in Hungary a month ago! After having purchased quite a few Hello Kitty figures from ceramic artist and now friend Neil Wolstenholme, I have been wanting to create my bespoke creation so was very keen to participate in his workshop. After the success of the first one (Classic version), Neil thought it would be an idea to try another method of painting: Using transfers and luster paint. Couldn’t wait to try!
Creating Hello Kitty
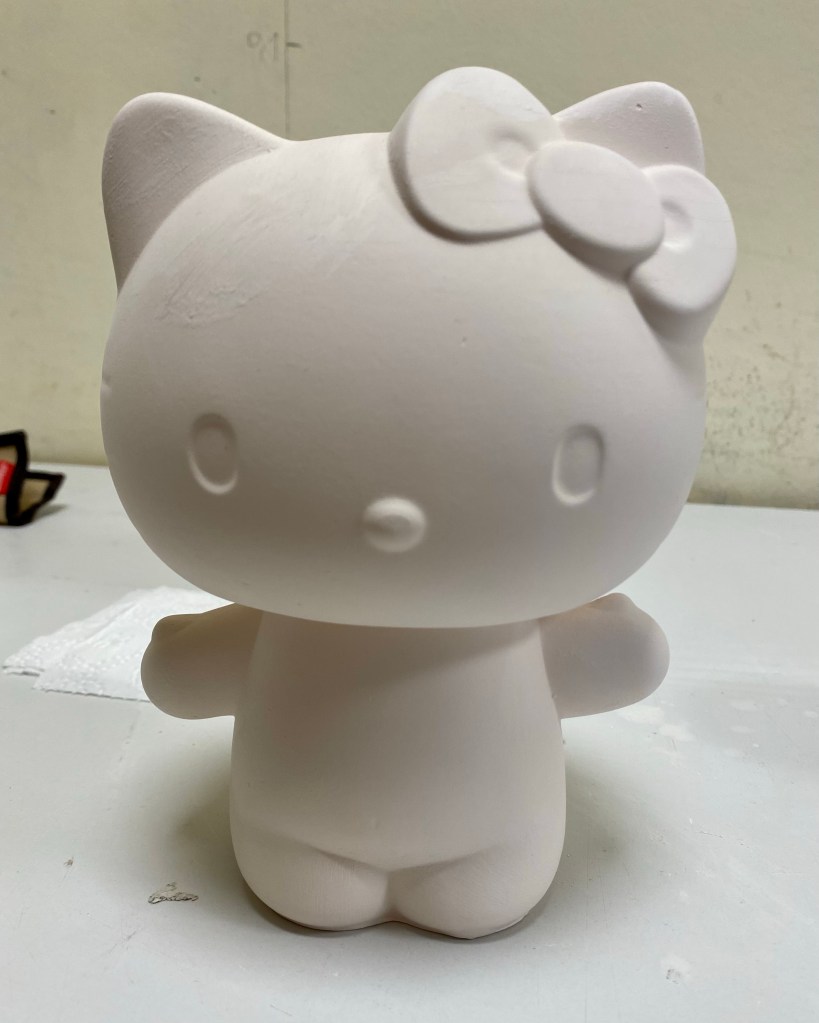
On our first day of the Workshop, Neil demonstrated how his Hello Kitty figures are formed using liquid ceramic and pre-made molds as per Hello Kitty Molded. And once dry, they look like these!

First Firing
Then they are fired in the kiln at 900°C, that’s right, 900°C! As it takes time for the kiln to heat up to that temperature and then to cool down slowly, they are left in there overnight. It is important that the ceramic items do in fact have the chance to cool down slowly and not be removed too soon as a sudden change in temperature could cause them to snap. And here goes…
Getting Transferred
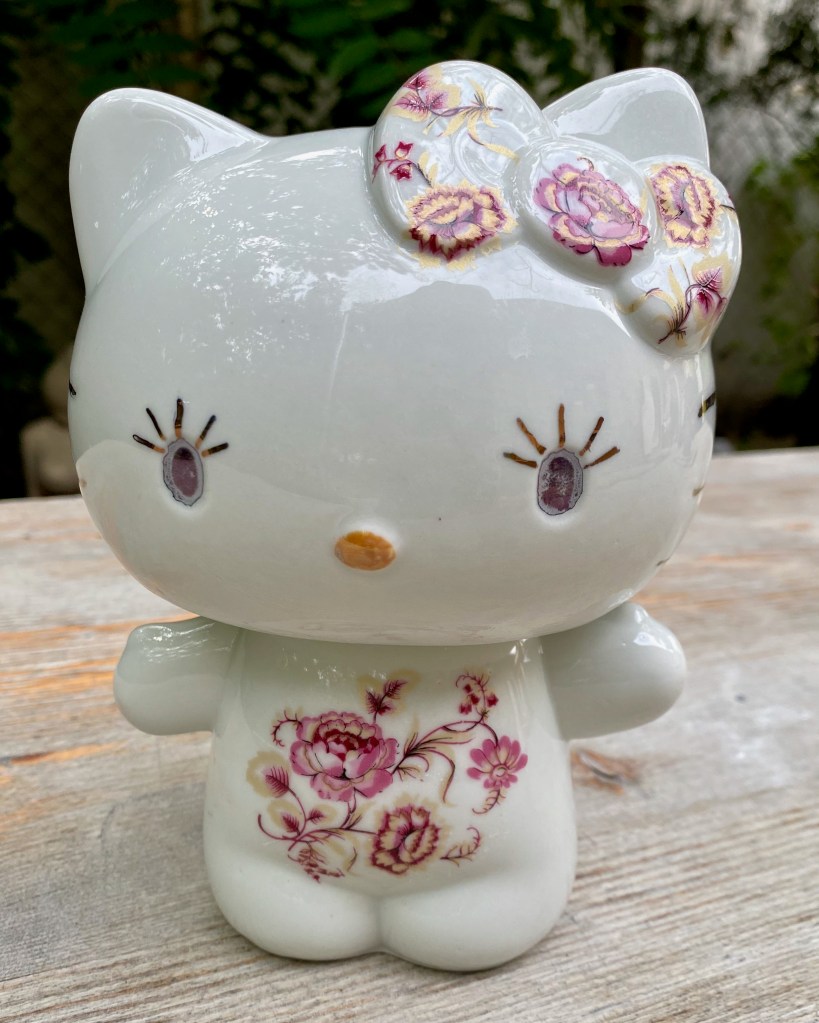
The resulting figure is rather delicate as it’s hollow so I had to be very cautious with handling it whilst painting. And of course being as precise as possible! That decorating this particular one was a bit easier compared to the first piece. Neil had a selection of transfers from which I selected a few floral prints with a rather Laura Ashley look and cut out each shape I liked. First you need to dip the chosen transfers into a dish of water and carefully place them on the desired spot. I was assured that the yellow background would disappear when fired in the kiln and that the brown flowers would turn a dark pink. Hmmm, we shall see…

Let’s Add Some Luster!
Once I was happy with the transfer placements, it was time to paint the face. A special luster paint was used here. Apparently it is a solvent-based enamel which provides a pearly finish with some sheen. I selected Blue for the eyes, Amber for the nose and Copper all for the lashes and whiskers, applying with a bamboo nib to ensure even strokes and (almost) straight lines. At this stage, all the colors look the same, but once again, Neil assured me that when fired in the kiln the effects will emerge. Can’t wait till it’s all finished then!

Second Firing
Unlike my Classic Hello Kitty, this piece did not get the glaze treatment. The focus was on the floral transfers to change colors and the luster paint to change effect. Then they are fired at a much higher temperature than before, 1,250°C. Now that’s very very hot! And for the same reason as the first firing, they are left in the kiln overnight for the temperature to gradually rise and cool down slowly. And sure enough, Neil was right. The yellow bit of the transfers have melted off and the pink has indeed emerged. Plus the colors of the luster paint also appeared, The copper for one thing has become metallic as I was hoping. Only regret was I could have worked on the eyes a bit more but not to worry, they do resemble blue pupils. THis particular piece was the first of all the Kitty’s that was completed and hence here we are, my Flower Power Hello Kitty!
And now another one of my own bespoke Hello Kitty ceramic figure I’ve been dreaming of. And to be able to create my own for that matter! As I am a rather fanatic collector of Hello Kitty, this is a perfect addition to my extensive collection. What makes this particular one so special is that we used a different method, and I learned there are many possibilities to decorate ceramics. Very very happy with it.
Please click here to find out more about Neil Wolstenholme and his amazing work!

1 Comment