

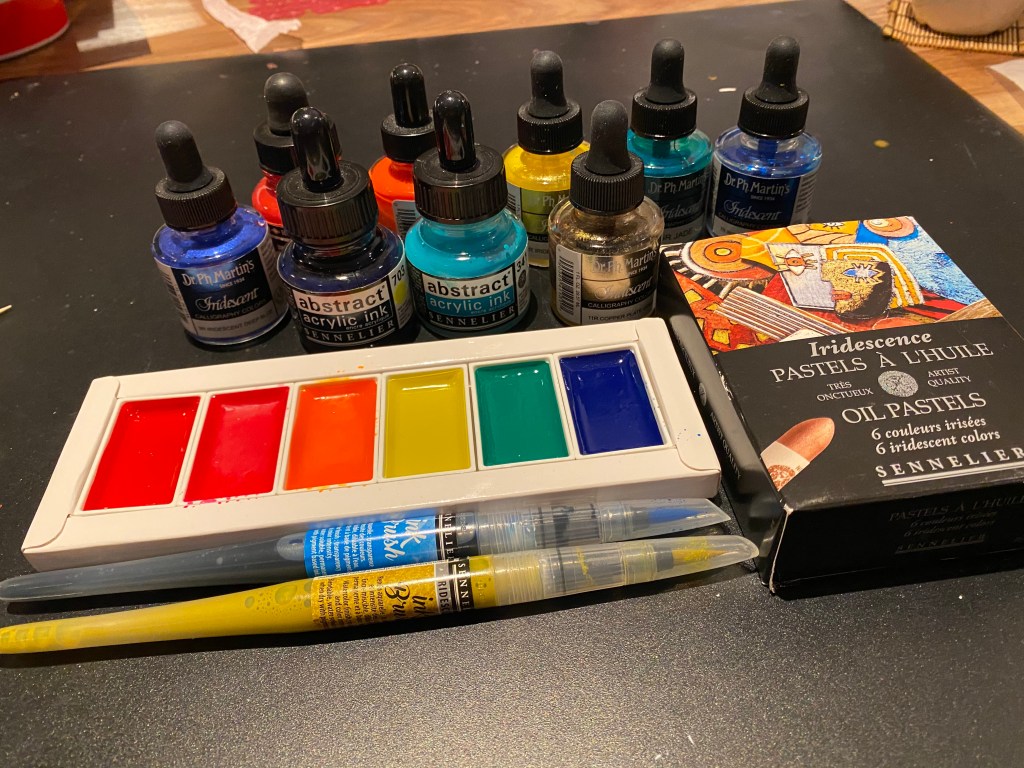
I’m really getting into collage lately, especially since following some mixed media classes by my two favorite tutors Tracy Verdugo and Juliette Crane. They’re both so creative and inspire me especially with their cute whimsical style and combining that with an abstract edge. Few days ago I began Lesson 2 of Juliett’s Serendipity I classes. Creating own collage paper was once again introduced. It’s also a great way to warm up and get our creative juices flowing. So here is what I used, grabbing them as I went along whatever I had in hand: Acrylic ink, India ink, oil pastels, ink brush markers.
Then we began by just randomly brushing on some watercolour. Juliette used a page in her sketchbook whereas I used a sheet of some cheap watercolour paper I got on Amazon years ago. I love the fluorescent range by Komorebi. Once that was done and whilst the paper was wet, I added a few drops of some turquoise and magenta acrylic ink and watched them spread. I further diffused the ink by spraying some isopropyl alcohol and wow!
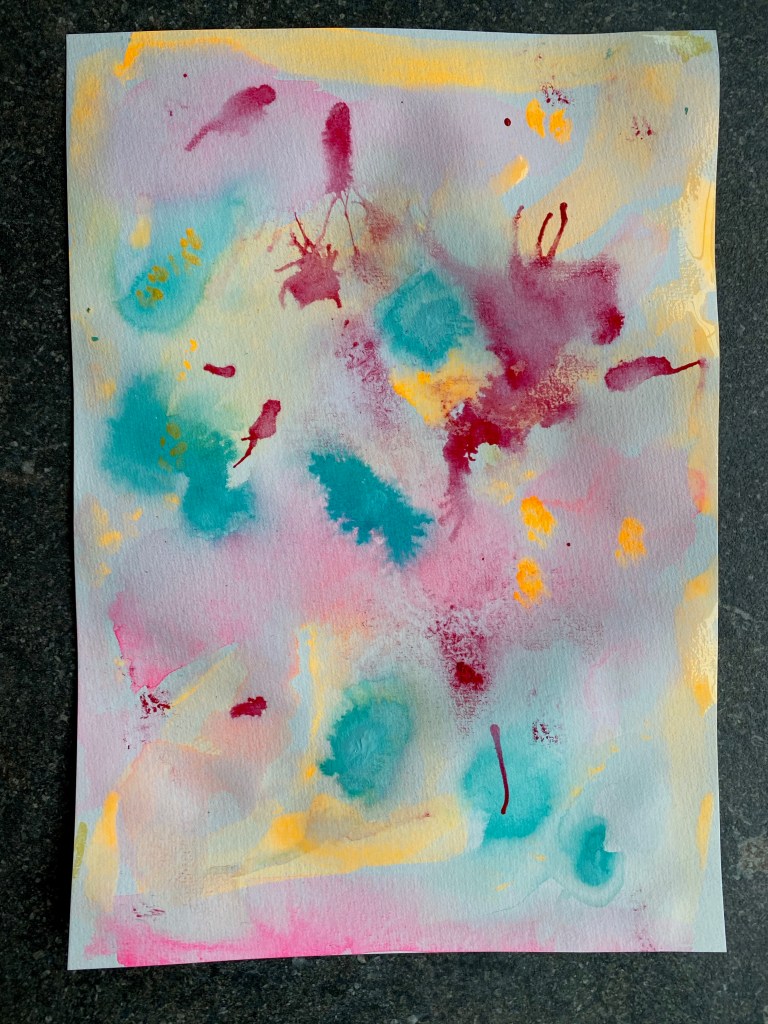
I just kept adding and adding inks where ever I felt like. With some metallic-colored oil pastels, I doodled some hearts and scribbles too. The water-based mediums resisted the oil when added on top, giving an interesting effect. Then some India Ink was introduced. There I just scribbled in more random shapes including flowers and with a wet brush, spread the ink out. I also experimented with Sennelier Ink Brush pens which came in iridescent shades, and this time I limited them to blue and gold. As it turned out, they are not permanent so tended to bleed. That’s ok though, as the purpose of this exercise was to experiment and create the unexpected. Then some more doodles were added with Payne’s Grey acrylic ink followed by some small details using Molotow acrylic markers in fluorescent pink and yellow.
As it turned out, I totally forgot the purpose of this was to make some collage paper rather than a cute paining! That means this paper would be eventually have to be torn up in portions then glued on the main painting. Oh no! I’m not sure if I am ready for that. Well, I guess I’ll wait a few days till I decide to take the plunge. Meanwhile, I took a photo of it and “framed it” on Pic Collage. So enjoy this painting while it lasts!

Ha! Art goes where it wants. We often don’t have a say in where or how it winds up!
LikeLiked by 1 person
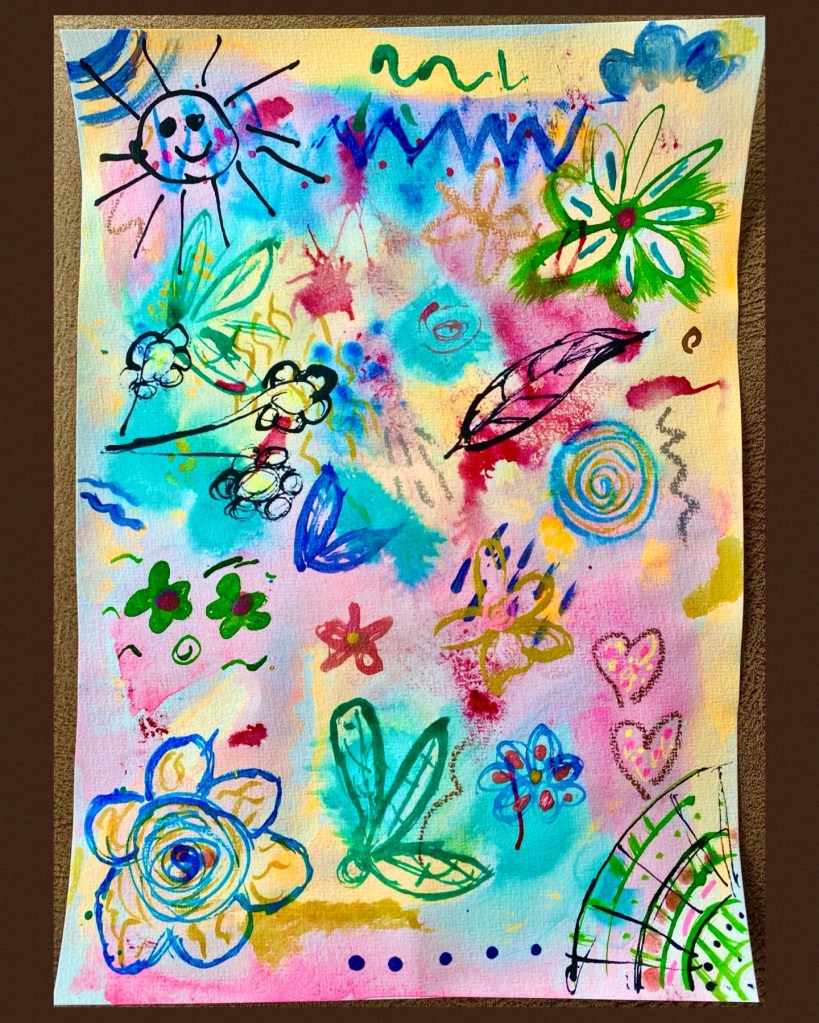
Today I took the plunge and finally got around to cutting it up and making a collage! I’m still working on the piece and curious how it will all turn out. Once completed I shall be sharing it here! 😊
LikeLike
Looking forward to it!
LikeLiked by 1 person
Coming up soon! ❤️
LikeLike